Tuesday, March 29, 2011

Always Believe

Sue has done it again! She came up with this darling design from the Always Believe line of Red Rooster fabric. It is so sweet that Fabric Trends has picked it up for their Spring 2011 magazine.


You can find the pattern in the magazine, we are waiting on the fabric to arrive.In the mean time, Sue is offering some insider tips on how to put the mail block together.
First up, here are all the cut pieces you need to make the block.

Next you take a pink triangle and a green triangle and stitch them together, then add a blue flower triangle.

You then take a pink strip and sew it to the green side (you'll make 4 of these), then partially stitch the pink square to the blue triangle end. Repeat steps to create 3 more blocks around the pink square.

Finish the block around the pink square.


Until next week - Cathy

Tuesday, March 22, 2011

Charming

Our Shop Hop was all about Charms - 5 inch squares of fabric and all the fun things you can do with them. Cathy had lots of samples done up for the weekend.


She used the very cool Creative Grid Templates, called The Charming 5 on the samples below.
Hatchet Block
Quarter Square Triangle Block
Snowball Block
Set on Point Square Block
Whirligig Block

There are 5 different rulers, each one is $13.75 and includes a pattern. They also have fun names.
Snowball Block:

 Hatchet Block:

Whirligig Block:


Set On Point Square Block: 
 

Quarter Square Triangle Block:


Tuesday, March 15, 2011

Shop Hop Has Sailed and We Are in Lancaster

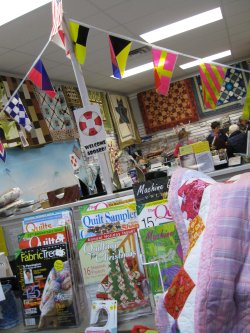
Our Shop Hop Was really fun! Thanks to all those who participated and helped make it a great weekend.

Here are some pictures from the weekend: If you want to see more check out our scrapblog


Alyson Newman and her daughter at the Thread & Bobbin
Book Signing on Saturday.

Allan's captains hat.

Right now we are in Lancaster at the Lancaster Quilt Show. Lancaster is known for many things, but what we find most interesting are the town names; Virginville, Paradise, Bird-in-Hand, Intercourse to name a few. If you are coming to the show the names definitely make the drive more fun!


The Quilt Basket will be closing at 5 on Thursday 3/17 and we will be back in the store on Tuesday 3/22.  

We have lots of fun classes coming up including; 4/2 Debby Browns' The Latest in Longarm Quilting. In this 2 hour information-filled seminar, you'll learn the latest tips, trends and products. You will learn a new technique and take home a pattern to practice your new skill. From 9-11 $25 fee.

5/7 HQ Sit-Down Class from 10-4 $75 fee. Fee includes all instruction and lunch! You just need to bring yourself. Instructor Debby Brown discusses various topics: free motion, templates, couching, tension, etc. You get to try out the HQ Sweet 16 and we are offering special pricing on class demo machines.

5/9 is National Apron Day

Saturday, March 12, 2011

Shop Hop Has Begun

We are having so much fun with our carnival shop hop. Sue did a great job decorating the store.


We will be open today until 5 and tomorrow from 12-4. Be sure to stop in and earn your FREE charm packets!

Thursday, March 10, 2011

Shady Endings

To finish up your shade:
Trim the shade sides to your roller dimensions.
Place decorative border on bottom of shade.
Fold over the top and top stitch to shade.


Leave one end open to insert plastic rod.


Put double stitch tape across top of shade to adhere to roller.


Roll shade up and install in window.

Tuesday, March 8, 2011

2011 Shop Hop Friday Directions


Quilt Basket Detour Directions for Friday

From 7-4 on Friday the town is working on the bridge over the rail trail. They are not detouring traffic, but instead closing the road for 20 minutes at a time.

To avoid delays use the following directions:
Coming on Myers Corners Road, make a right onto Montfort, make a left onto Lake Walton Road. At the light make a left onto Rt 376. We’re on the left past Guardian Self Storage.

The road work is only on Friday. There should be no traffic issues Saturday or Sunday.

Tuesday, March 1, 2011

Creating Shades

Sue is sharing her insights and tips for creating window shades. This sample uses Ty Penningtons fabric line from Westminster Fabrics.

First measure the INSIDE of your window frame.


Next buy a vinyl shade and brackets. Follow the manufacturers instructions for mounting the shade. Once mounted, remove the shade roller and remove the vinyl shade from the roller.
Bottom rail, brackets, shade roller, and Fuse-a-shade

Measure the tube portion of the shade roller. Cut your fabric 2 inches wider than the roller and the length of your window. Fuse your fabric to Fuse-A-Shade material the same width and length as your material.

Next week, Sue explains how to trim your shade, add the trim and bottom rail and attaching your shade to the roller.